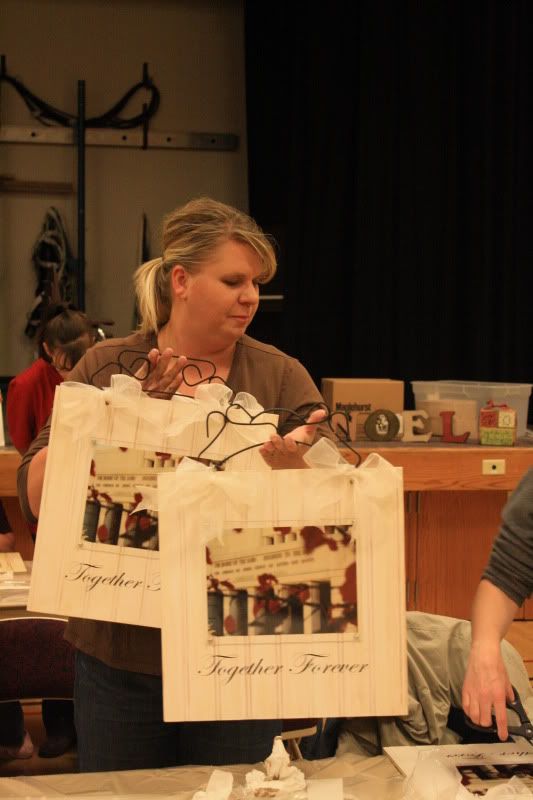
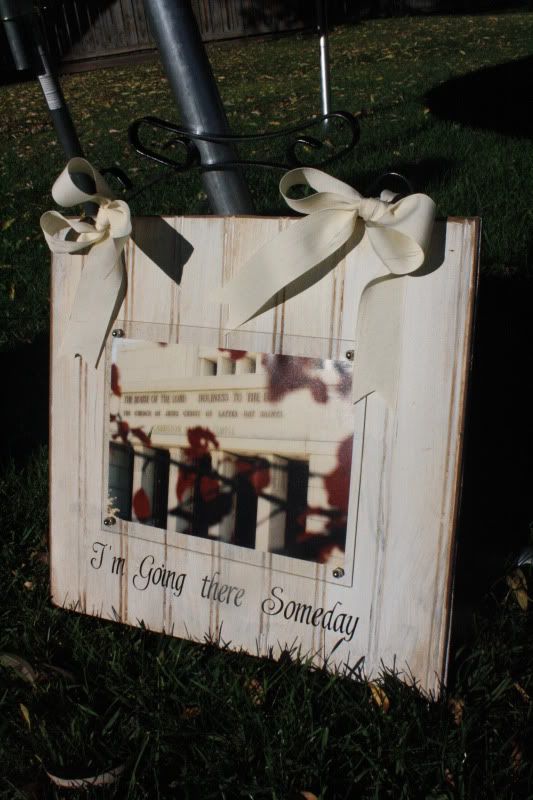
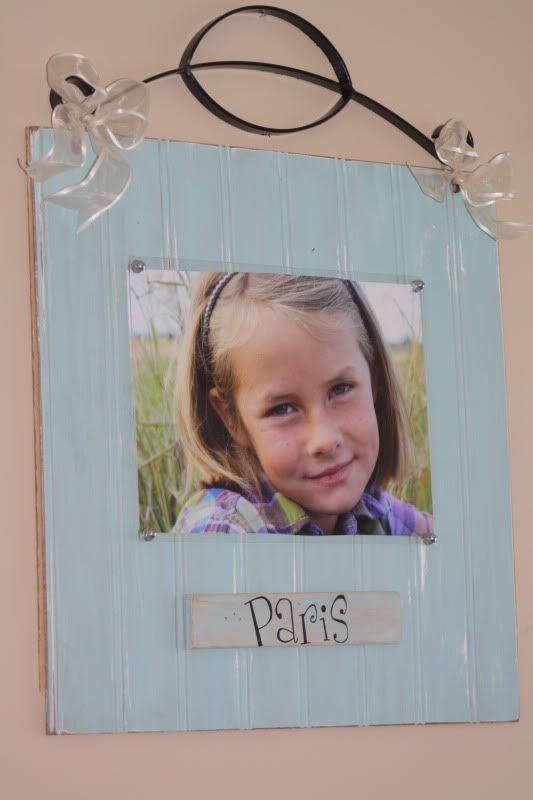
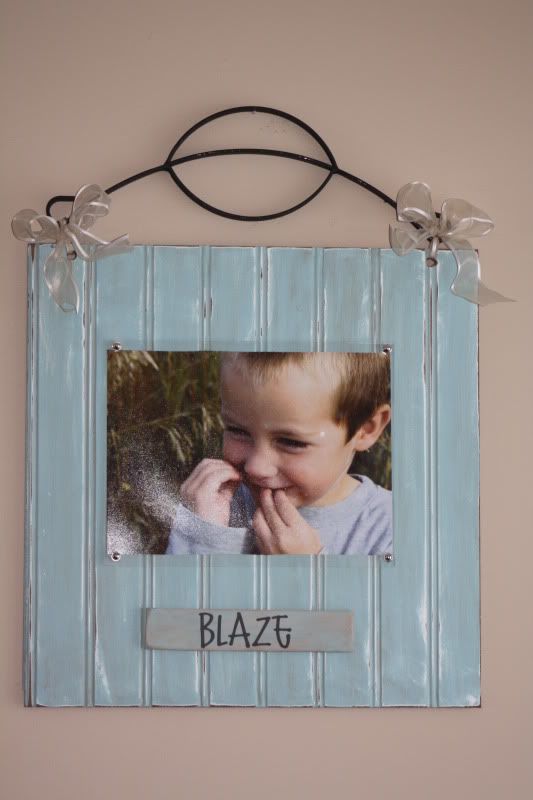
Ok So here is a quick "how to" on the Temple Picture craft. We did it for This November for Craft night! The ones I'm showing you are actually ones i did for my kid's but they are just painted different and i added a little something else to them. But the general directions are the same.
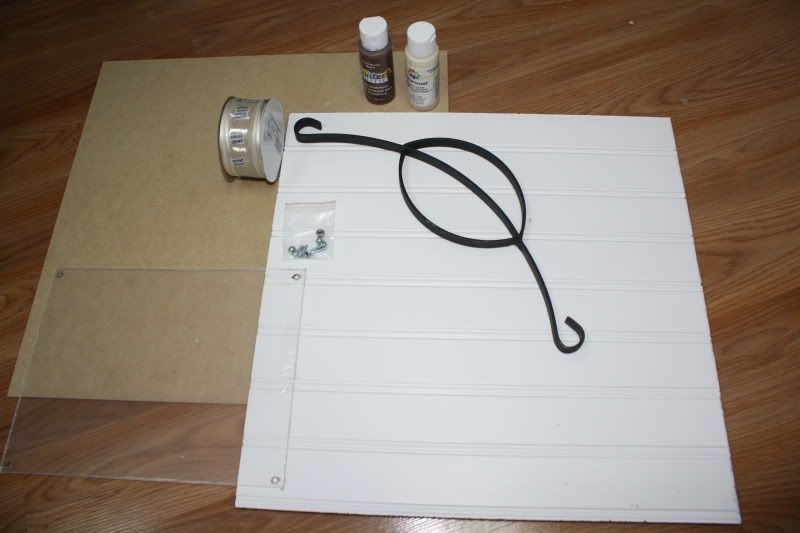
Supply list:
1. 16 x 16 Piece of Bead board. We got ours from Home Depot but we had to by a 4 x 8 sheet and we had them cut it down to 16x16 i think it ended up giving us 18.
2. 16 x16 1/8inch MDF we got this at Totem in a 4 x8 sheet and had them cut it down into the 16 x 16 pieces as well
3. Wood Glue
4. Clamps
5.8 x 10 piece of Plexi glass. You can get the precut ones at Home Depot for $5 or we got a larger sheet of it and Brad cut it on a table saw. It's cheaper this way but you have to have a very Sharpe blade and you have to be very careful so it does not chip.
6. 1/2 inch #6 screw's (Home Depot)
7. #6 acorn Nut's (Home Depot)
8. 2 yards of ribbon per picture
9. Iron Handle We were lucky enough to find a Man in town to do them up for us. (Charlie at the Co-Op).
10. Drill
Instructions:
1. Glue with wood glue your 1/8 MDF to the Bead board. Use clamps to press it together. Let it dry for a couple hours (we left ours overnight)
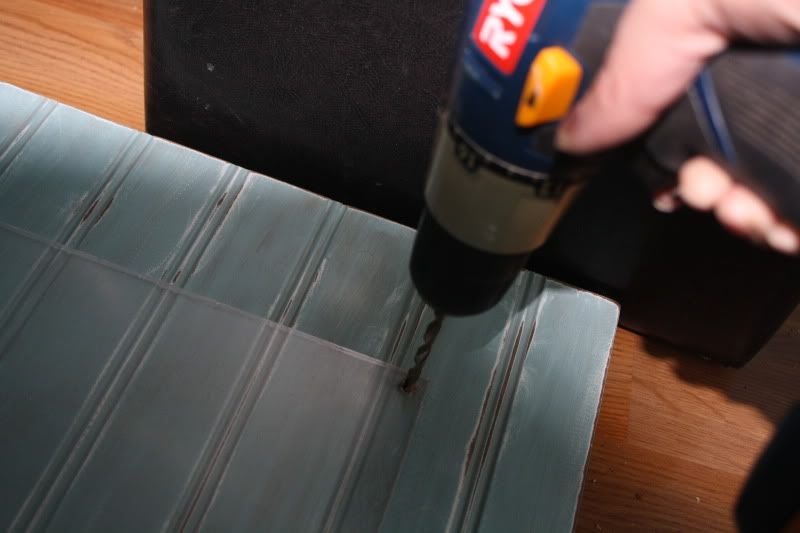
2. You need your drill out now. You'll need to find Drill bit's that match your screw's then one bigger drill bit for your handle.
3. You can Drill the holes in your plexi glass. With this you have to be a bit careful cause the Plexi will chip if you press to hard. But drill holes about a quarter inch in from each corner.
4. Once the plexi is drilled Place the plexi were you want your picture to be. Get a marker or pencil and mark the holes from the plexi onto the bead board.
5. remove your plexi and drill the 4 holes in the board.
6. Place your handle above the top middle of the board. You can mark were your bigger holes ( for the ribbon) should be. Mark and drill with the larger drill bit.
7. OK now's it time to paint... For the Temple pictures we sanded down the Bead board a bit cause it comes with kinda a weird finish. So sand it down a bit just to rough it up. Next put a coat of ivory paint. After that dry's you can do a lite sanding (depending on the look your going for) and put a coat of brown wash (wash is made from a bit of Brown paint mixed with water) you wipe it on and the wipe it off again. Keep doing that till you get your desired look.
For mine i used a robin's blue paint and i ruffed it up quite a bit and did a darker wash on it.
6. After your paint dry's completely you can start putting your frame together. First you'll have to trim down your 8 x 10 print a bit. You can measure but it just has to fit between your plexi drill marks.
7. So take the protective coat of your plexi glass now place the picture under it and put it on the board making sure all the holes match up. Put your screw's under the board through the hole and the Acorn nut goes on top and screw's into the screw. (wow did that make sense.)
8. thread your ribbon through the top holes and around your Handle. and then tie in a bow.
9. Apply your vinyl and your done!!
For mine that I'm using for the kid's i added a little Wood piece to the bottom with wood glue and put there name on it.



0 comments:
Post a Comment